前言
- 案例存放地:https://github.com/YHF7/Android
- 使用的软件是 Android Studio
组件
Button/TextView
- id
- text 文本
- textSize 大小
- dp 为单位
- background 背景色
1
2
3
4
5
6
7
<Button
android:id="@+id/btn1"
android:layout_width="wrap_content"
android:layout_height="wrap_content"
android:textSize="30dp"
android:background="#00f"
android:text="2"/>
EditText 文本字段
- 这个用法和上面的都是一样
- 这里输入文字是用hint不是text
- 不过可以使用inputType属性控制
1
2
3
4
5
6
<EditText
android:id="@+id/edit1"
android:layout_width="wrap_content"
android:layout_height="wrap_content"
android:hint="请输入密码"
android:inputType="textPassword"/>
AutoCompleteTextView 自动提示
- 用法基本相同
- completionHint 默认显示
- completionThreshold 最少输入多少个字开始搜索
1
2
3
4
5
6
7
<AutoCompleteTextView
android:id="@+id/act"
android:layout_width="150dp"
android:layout_height="wrap_content"
android:completionHint="请输入搜索内容"
android:completionThreshold="1"
/>
绑定组件属性控制 (app/src/main/java/com.example.yhf.tablelayout/TableLayout)后面那一段就很的项目名有关联了
- 每一个项目里面都会有一个控制这个程序的
- 我们现在来吧上面几个定义的组件给他绑定一下
1 |
|
CheckBox复选框
- CheckBox和Button一样,也是一种古老的控件,它的优点在于,不用用户去填写具体的信息,只需轻轻点击,缺点在于只有“是”和“否”两种情况,
- Checked属性是CheckBox最重要的属性之一,改变它的方式有三种:
1、XML中申明 2、代码动态改变 3、用户触摸1
2
3
4
5
6
7<CheckBox
android:id="@+id/cb"
android:layout_width="wrap_content"
android:layout_height="wrap_content"
android:checked="false"
android:text="已婚"
/>
它的改变将会触发OnCheckedChange事件,而您可以对应的使用OnCheckedChangeListener监听器来监听这个事件,1
2
3
4
5
6
7
8
9
10
11//获取CheckBox实例
CheckBox cb = (CheckBox)this.findViewById(R.id.cb);
//绑定监听器
cb.setOnCheckedChangeListener(new OnCheckedChangeListener() {
public void onCheckedChanged(CompoundButton arg0, boolean arg1) {
// TODO Auto-generated method stub
Toast.makeText(MyActivity.this, "选中了":"取消了选中" , Toast.LENGTH_LONG).show();
}
});
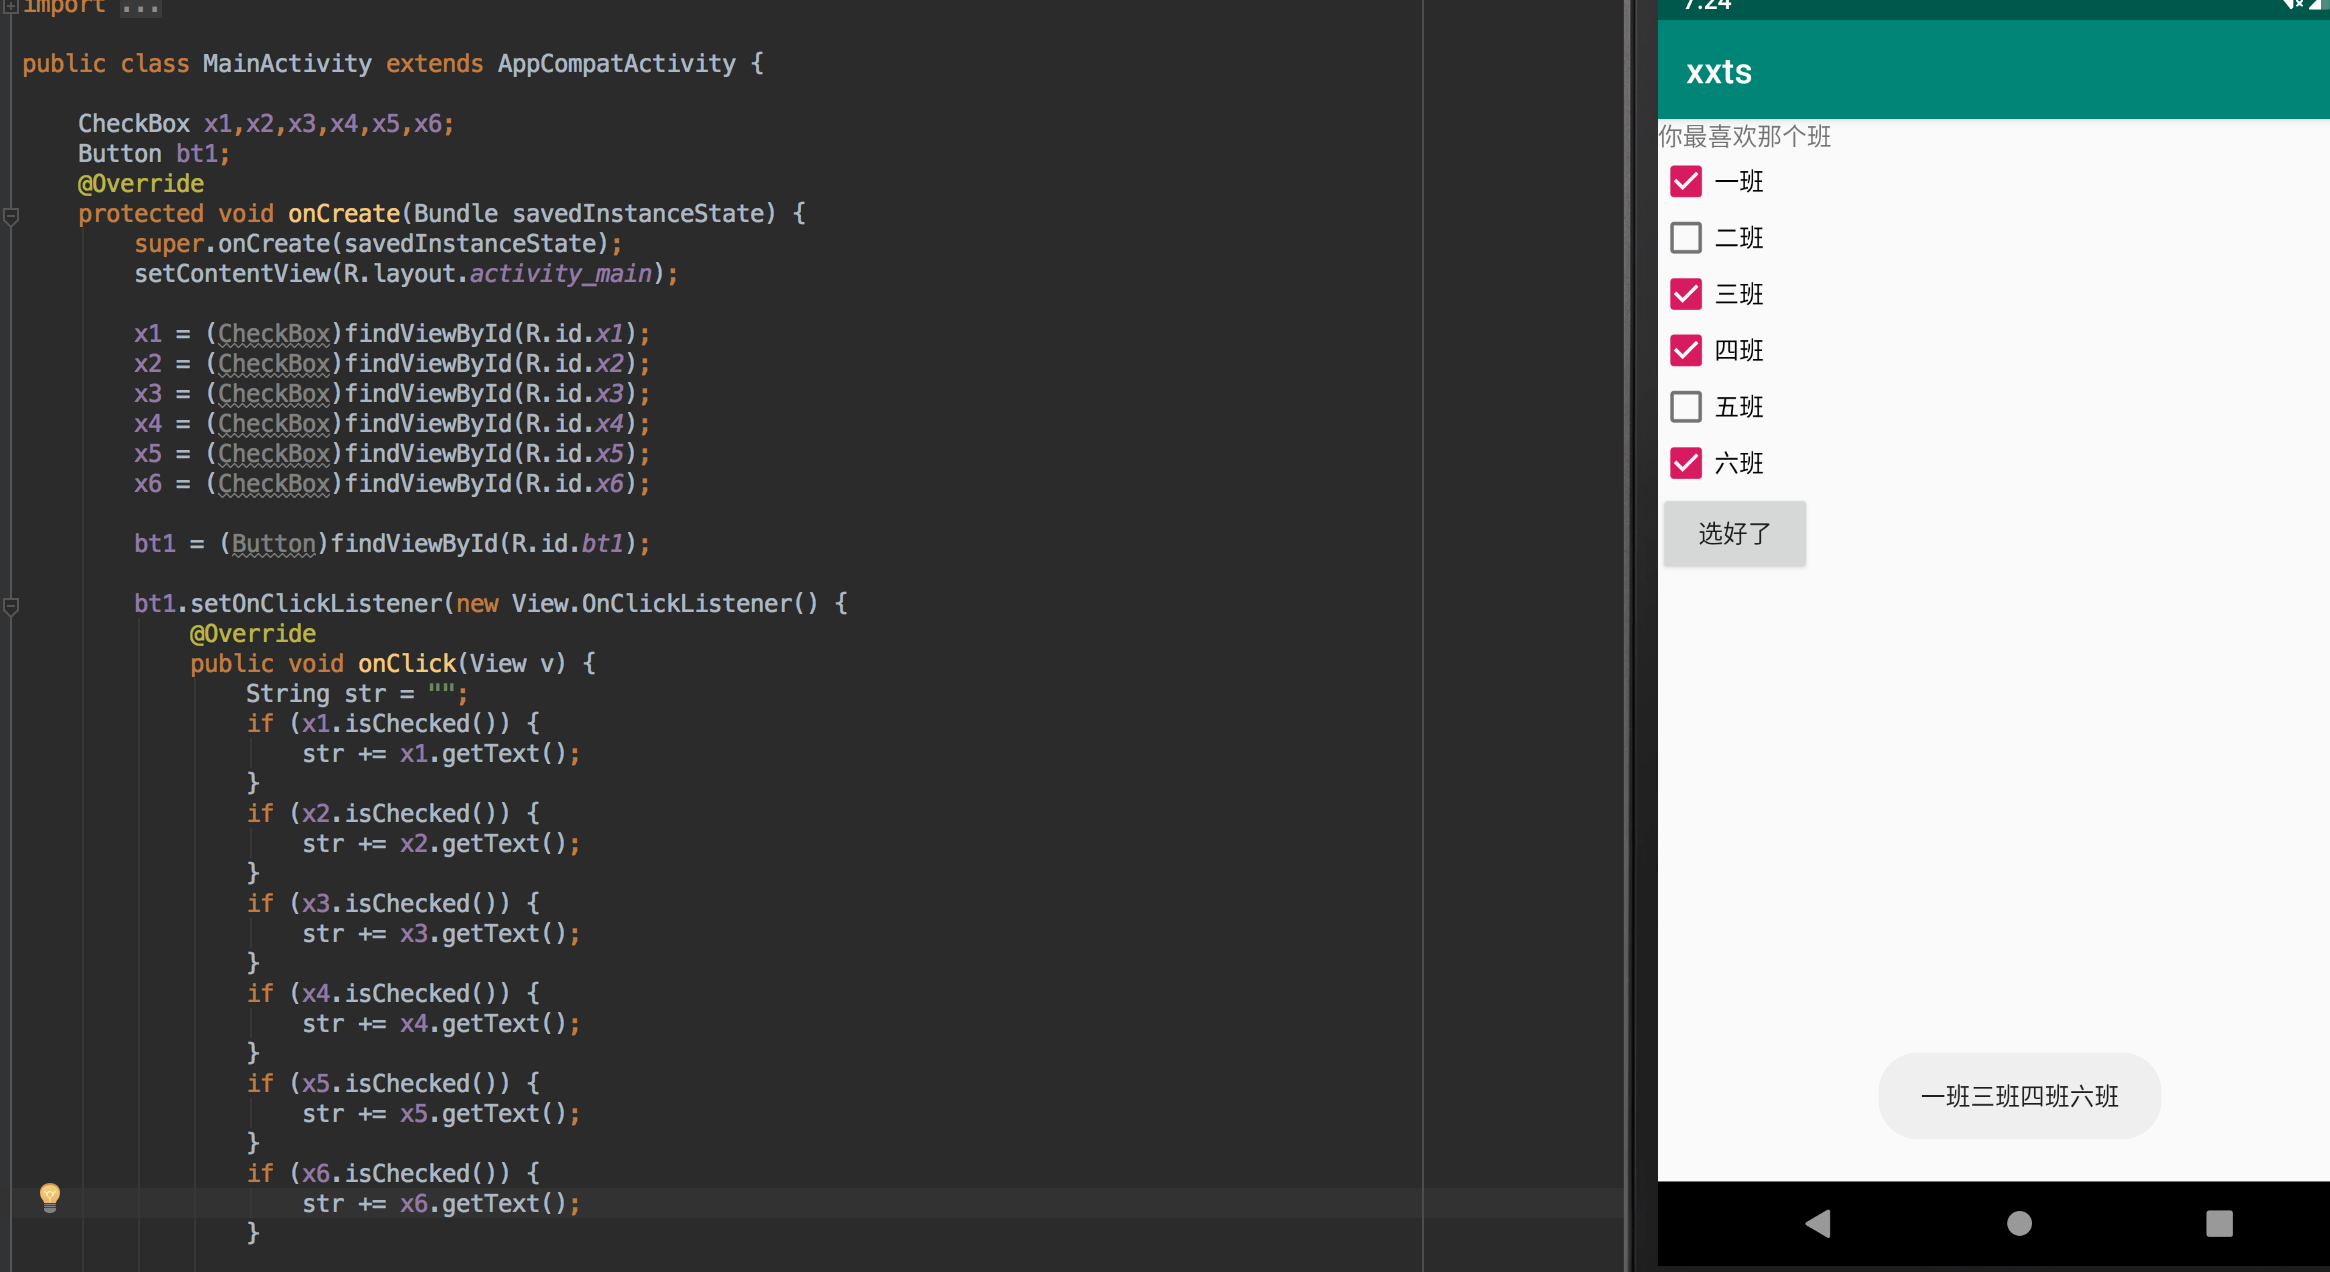
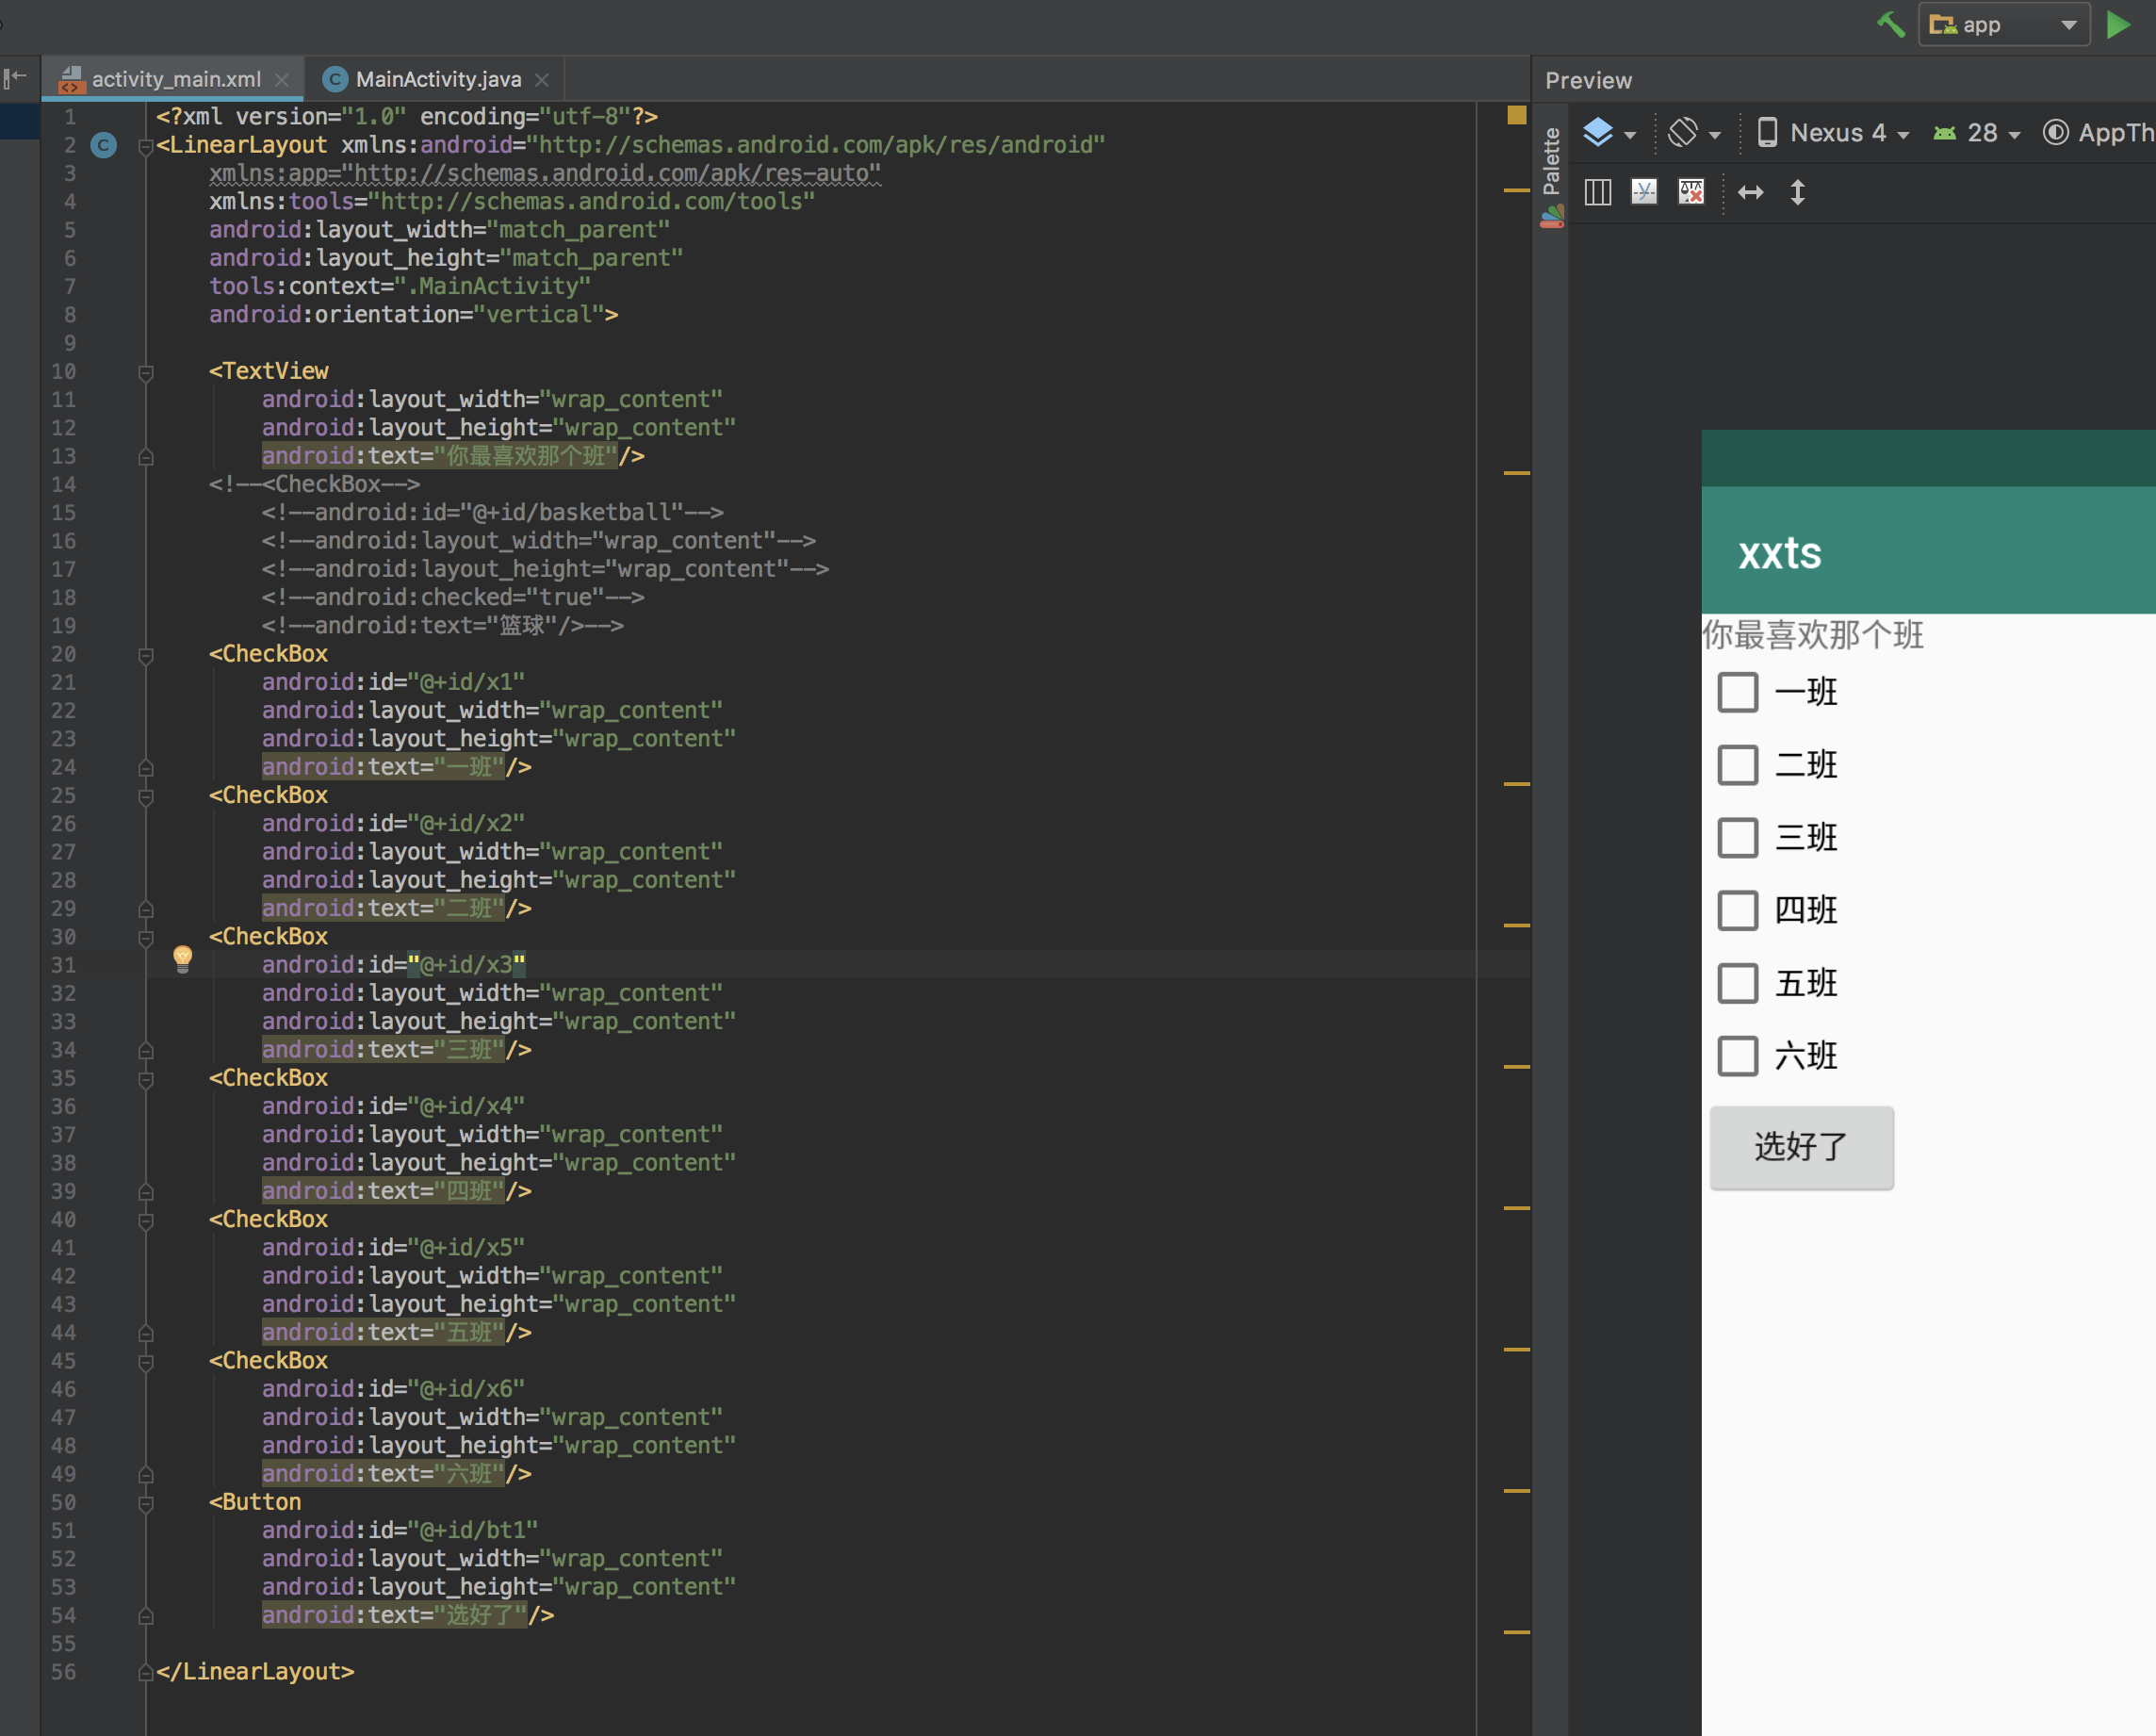
选择显示小案例
- 页面
- 控制
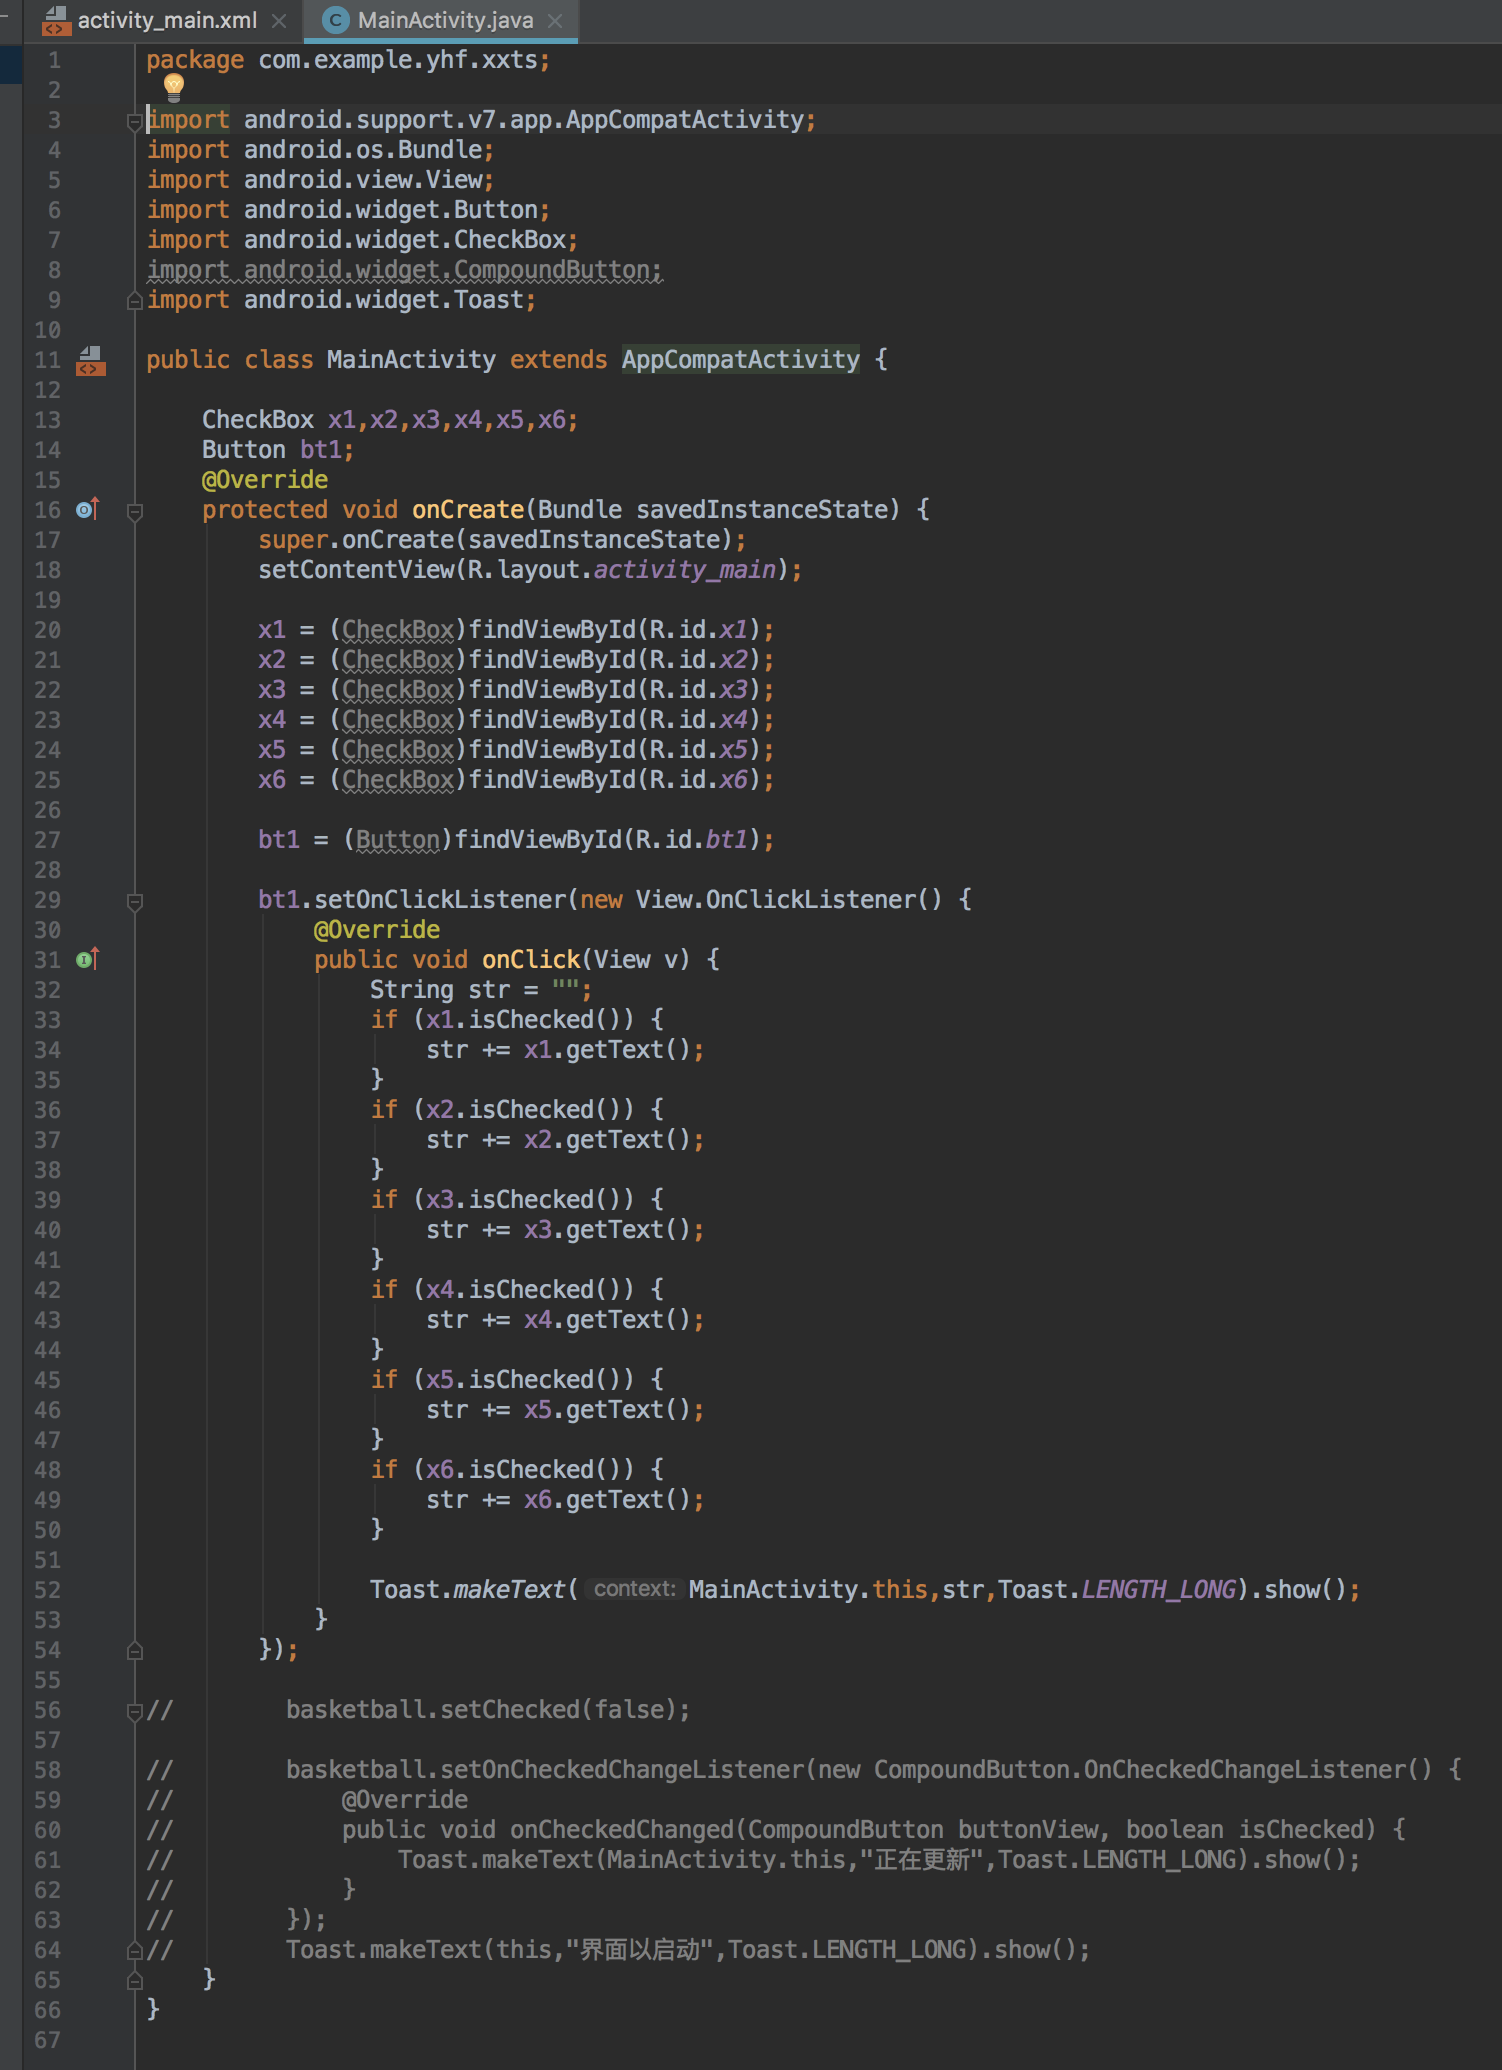
- 效果